
Want to hang a really simple, super cute witch cauldron on your wall or door as part of your Halloween décor? I made this easy-to-make little witch cauldron that can be used almost anywhere! This recipe explains how to create a witch’s cauldron and lists all the ingredients you’ll need.
How to Make a DIY Witch Cauldron
If you’ve visited the blog (thank you!), you’re probably aware of my extreme Halloween enthusiasm. To be honest, we begin decorating in August. I wanted to put a witches cauldron under my Minnie Mouse witch hat on my front porch this Halloween (yes, it’s more than just a day for this gal!), but none that I actually looked for in the stores seemed to fit the bill.
DIY Witch Cauldron Supplies
To create your DIY witch cauldron, gather the following materials:
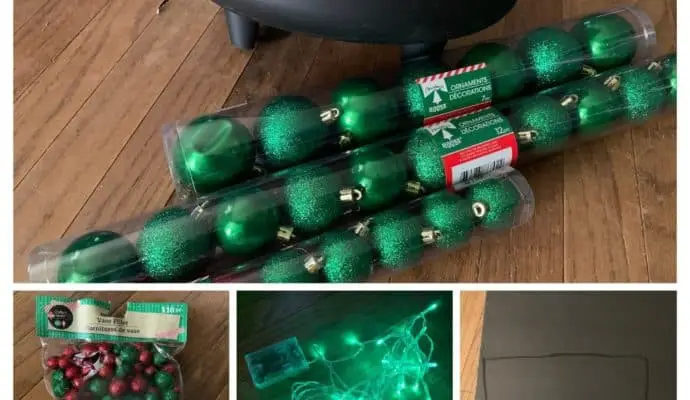
- A sturdy plastic cauldron (avoid thin plastic to prevent cracks when cutting)
- Plastic green ornaments in various sizes (check your local Dollar Tree’s Christmas section)
- Vase filler (also found in the Christmas section)
- Green LED lights (cordless preferred, or go for corded mini lights if you’re okay with a cord)
- Black foam board
- Cotton or poly filling (you can reuse from an old comforter or buy new)
- Glue gun or A6000 glue (a glue gun works faster)
- String or plastic-coated wire for hanging
- Two bread bag ties
- A hacksaw or electric saw for cutting the cauldron
- A drill for creating holes in the cauldron’s sides
DIY Witch Cauldron Step 1: Cutting the Cauldron

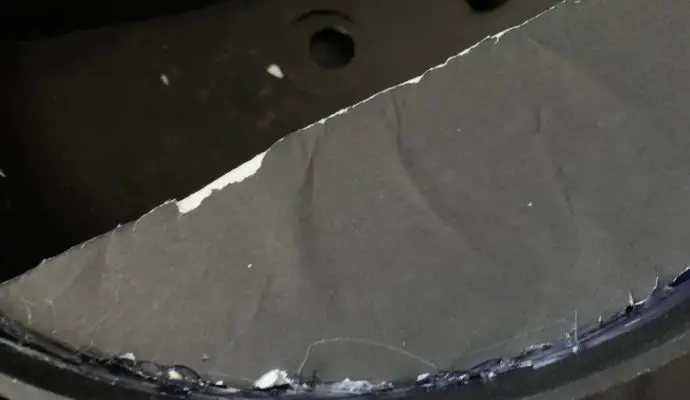
First, carefully cut the back of your cauldron to create a flat surface for mounting. It’s important to draw a guideline before you cut to ensure the shape remains consistent. Use a hacksaw or electric saw for this step, and make sure to avoid cutting the handle area.
After cutting, drill two small holes near the handles to help hang your cauldron once it’s completed.
DIY Witch Cauldron Step 2: Gluing the Foam Board
Next, trace the flat back of the cauldron onto a black foam board, and cut it out. This foam board will serve as the backing for the cauldron. Additionally, trace and cut out a curved piece to fit the top interior of the cauldron, creating a lip. Secure both pieces with hot glue. Don’t worry if it’s not perfect—everything will be covered in fluff and ornaments later on.
DIY Witch Cauldron Step 3: Gluing the Ornaments
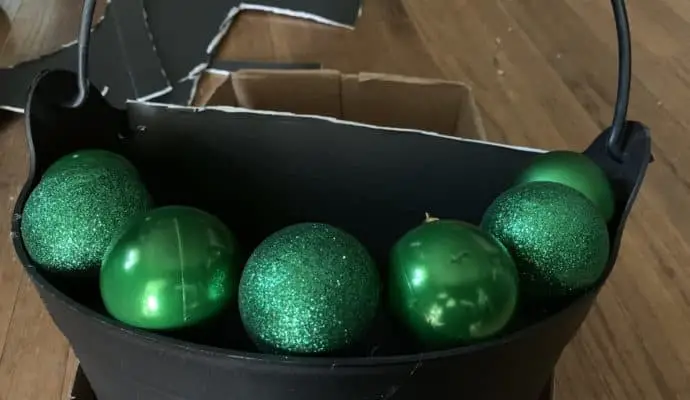
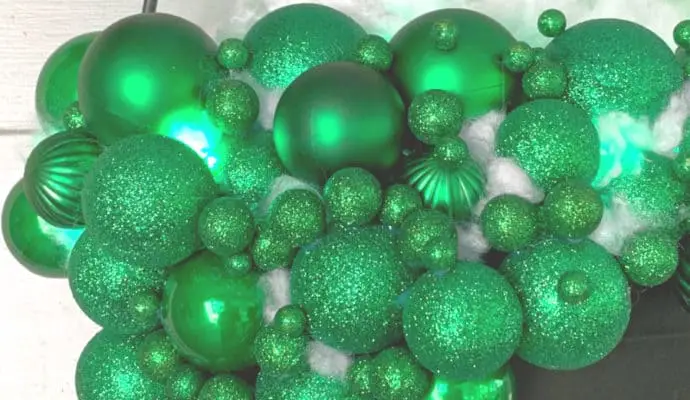
This is where your creativity comes into play! Start by hot gluing the largest green ornaments to the foam board on the front of the cauldron. Remove the gold hangers from the ornaments before gluing them for a cleaner look. As you go, use smaller ornaments to fill in gaps and create an overflowing, bubbling effect.
DIY Witch Cauldron Step 4: Filling in Gaps
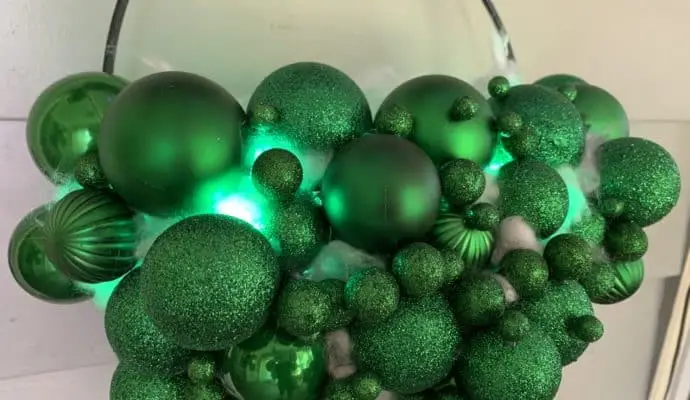
Now, grab the green vase filler and hot glue it into the gaps between the larger ornaments. This filler will add extra texture and dimension to your cauldron display. To enhance the bubbling effect, use small pieces of cotton or poly filling at the top of the cauldron. Place a larger piece of the filling inside the cauldron, allowing it to peek over the ornaments for a foamy, bubbling look.
DIY Witch Cauldron Step 5: Securing the Foam Board and Back
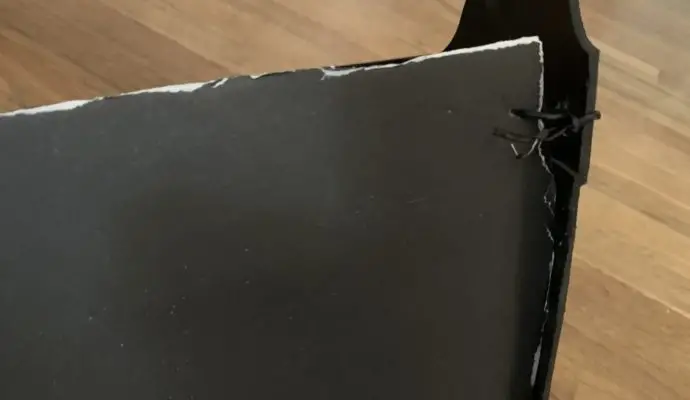
While you can hot glue the foam board backing, using bread bag ties is a great alternative for extra security. Thread the ties through the drilled holes and fasten them tightly, so the backing stays in place. This method is less messy if you need to make adjustments later.
To hang your cauldron, use the drilled holes to secure a length of plastic-coated wire. Tie it off securely, as you would when hanging a picture frame, making sure the wire is tight and out of sight.
DIY Witch Cauldron Final Step
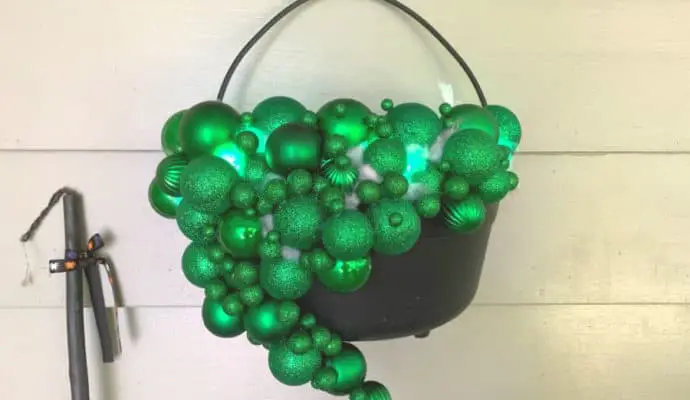
The final touch is adding the green LED lights. Tuck the lights into the gaps between the ornaments and fluff, creating a glowing, magical effect. Adjust the cotton filler as needed to diffuse the light and enhance the bubbling illusion.
And there you have it! A fun, spooky witch cauldron perfect for Halloween. Hang it on your door, wall, or even let it float like a haunted display. Happy Halloween crafting!